How to structure your ML code
Feb 16, 2024
Because real-world ML projects do not fit in one Jupyter notebook
Jupyter notebooks are a great tool for fast iteration and experimentation during your ML development.
However, they are not enough when you go beyond this experimentation phase, and want to build a real-world end-2-end ML app.
The problem
ML apps, like any other piece of software, can only generate business value once they are deployed and used in a production environment.
And the thing is, deploying all-in-one messy Jupyter notebooks from your local machine to a production environment is neither easy, nor recommended from an MLOps perspective.
Often a DevOps or MLOps senior colleague needs to re-write your all-in-on messy notebook, which adds excessive friction and frustration for you and the guy helping you.
So the question is
Is there a better way to develop and package your ML code, so you ship faster and better?
Yes, there is.
Let me show you.
Solution
Let me show you 3 tips to structure your ML project code with the help of Python Poetry.
What is Python Poetry? ✍️
Python Poetry is an open-source tool that helps you declare, manage and install dependencies of Python projects, ensuring you have the right stack everywhere.
You can install it for free in your system with a one-liner.
Tip 1 → Poetry new 🏗️
Imagine you want to build an ML app that predicts earth quakes.
Go to the command line and type
$ poetry new earth-quake-predictorWith this command Poetry generates the following project structure.
earth-quake-predictor
├── README.md
├── earth_quake_predictor
│   └── __init__.py
├── pyproject.toml
└── tests
    └── __init__.py
You can now cd into this newly created folder
$ cd earth-quake-predictorand generate the virtual environment
$ poetry installwhere all your project dependencies and code will be installed.
I recommend you build modular code, for different parts of your system, including:
-
data processing and feature engineering.
-
model training
-
model serving
like this ↓
earth-quake-predictor
├── README.md
├── earth_quake_predictor
│   ├── __init__.py
│   ├── data_processing.py
│   ├── plotting.py
│   ├── predict.py
│   └── train.py
├── pyproject.toml
└── tests
    └── __init__.py
Tip 2 → Doing notebooks the right way 📔
If you are into notebooks, and want to use them while developing your training script, I recommend you create a separate folder to store them
earth-quake-predictor
├── README.md
├── earth_quake_predictor
│   ├── __init__.py
│   ├── data_processing.py
│   ├── plotting.py
│   ├── predict.py
│   └── train.py
├── notebooks
│   └── model_prototyping.ipynb
├── pyproject.toml
└── tests
    └── __init__.py
Now, instead of developing spaghetti code inside an all-in-one Jupyter notebook, I suggest you follow these 3 steps
-
Write modular functions inside a regular .py file, for example a function that plots your data
# File -> earth_quake_predictor/plotting.py def my_plotting_function(): # your code goes here # .... -
Add this cell at the top of your Jupyter notebook to force the Jupyter kernel to autoreload your imports without having to restart the kernel
%load_ext autoreload %autoreload 2 -
Import the function and call it, without having to re-write it.
from earth_quake_predictor.plotting import my_plotting_function

my_plotting_function()
Tip 3 → Dockerize your code 📦
To make sure your code will work in production as it works locally, you need to dockerize it.
For example, to dockerize your training script you need to add a Dockerfile
earth-quake-predictor
├── Dockerfile
├── README.md
├── earth_quake_predictor
│   ├── __init__.py
│   └── ...
├── notebooks
│   └── ...
├── pyproject.toml
└── tests
    └── __init__.py
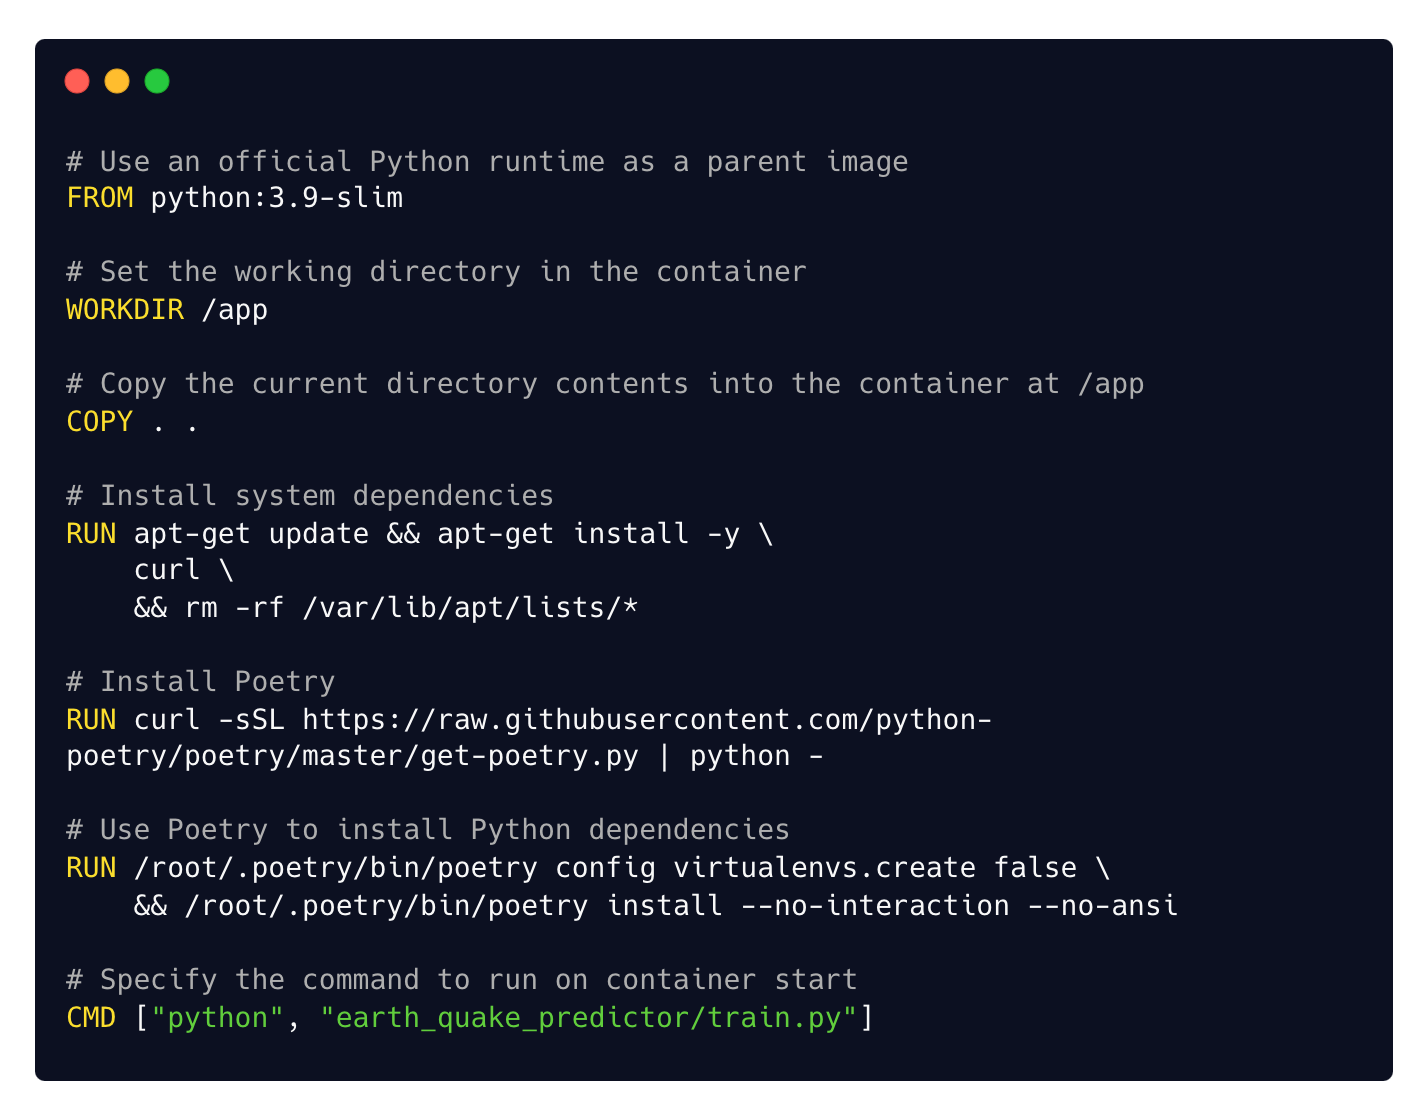
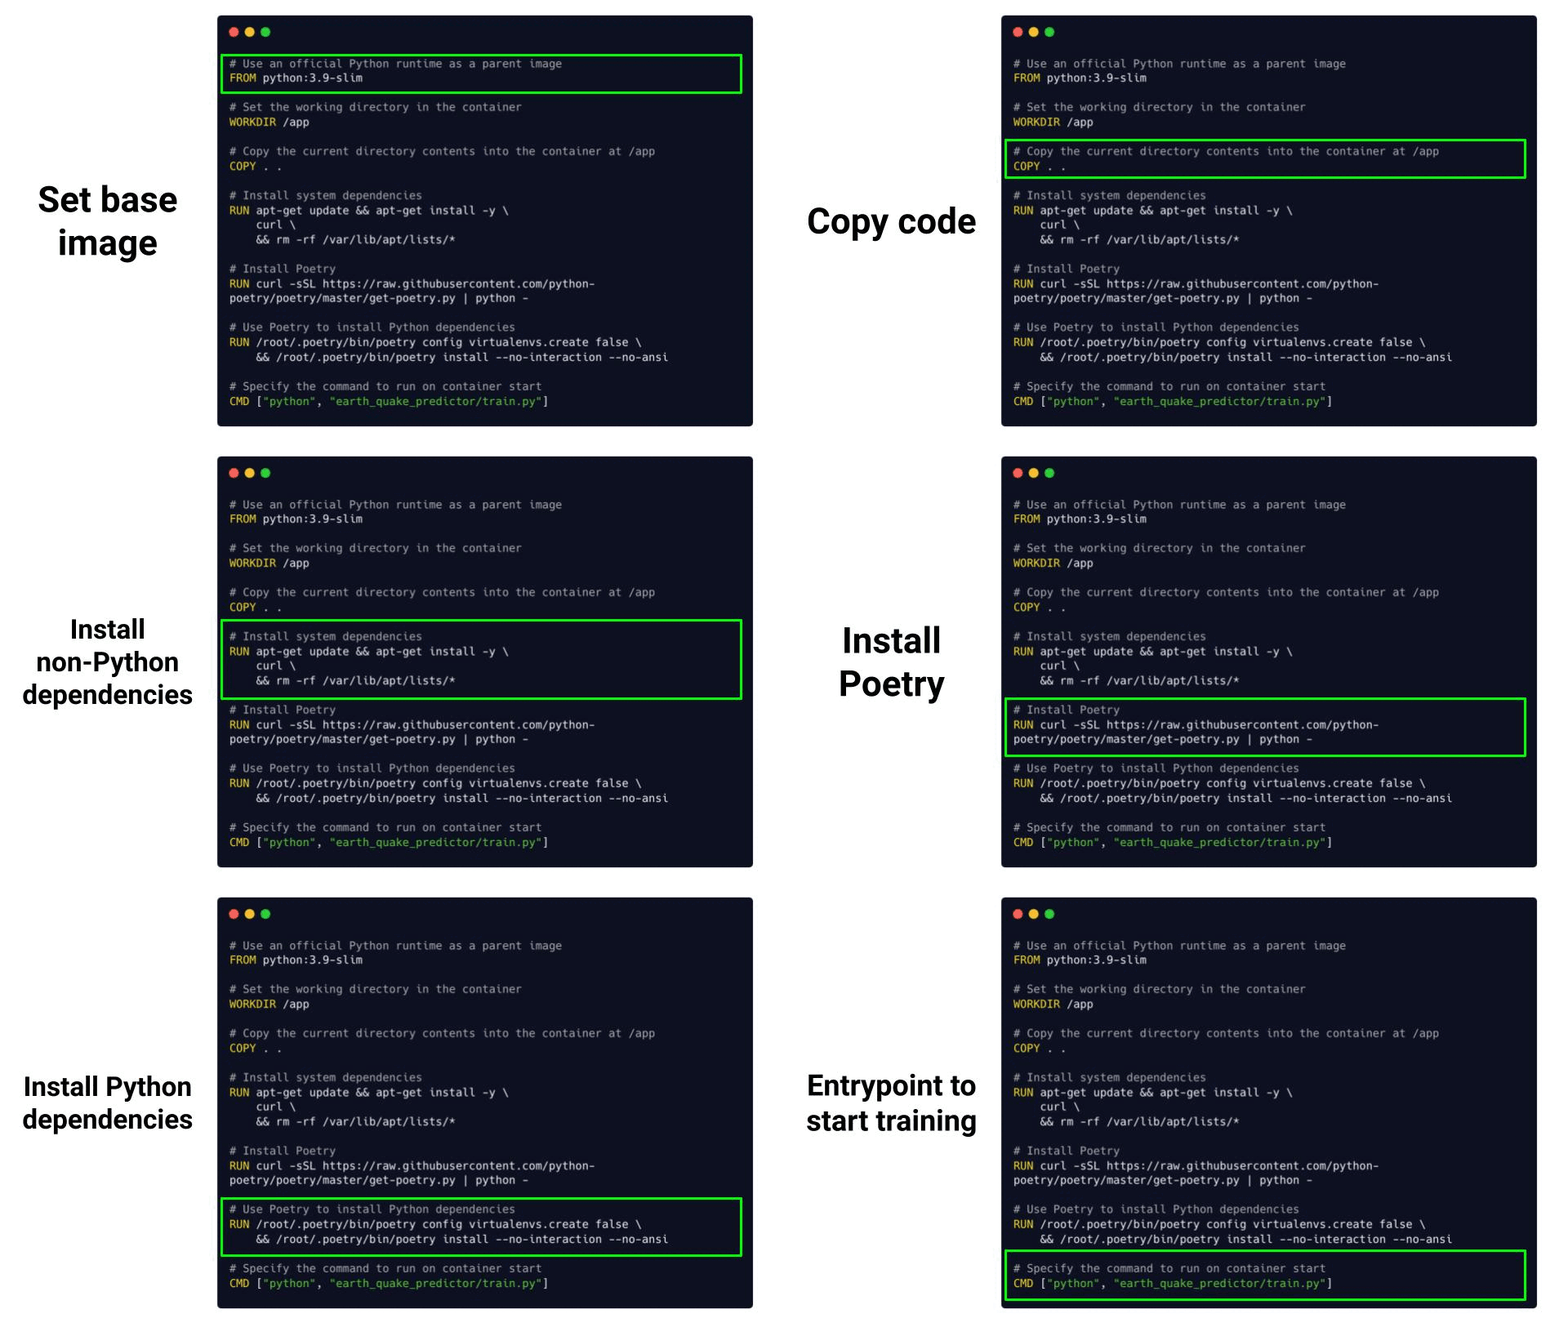
The Dockerfile in this case looks as follows

Where each instruction is a layer, that builds on top of the previous layer.

From this Dockerfile you can create a Docker image
$ docker build -t earth-quake-model-training .and run your model training inside a Docker container
$ docker run earth-quake-model-trainingBOOM!
That’s it for today guys.
Talk to you next week.
Enjoy the weekend.
Peace, Love and Laugh.
Pau

